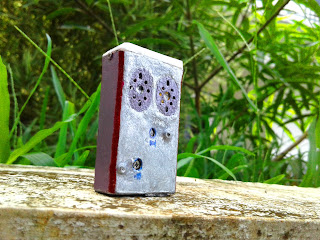
I made a portable Pocket BOOMbox some days before. It contain a music player and an emergency light system. Here I explain about it. Basically I am a music lover. So I planed to made a music player fully made by me (full circuit). So I search about it. Then I find a website, in which explain a music player work based on the ATtiny85 micro-controller. I plan to make it. I am not more familiar with programming. So I copy the same program which is given in the website. The link is given in the last portion. But I modify the hardware and design a new one with some extra features and the whole circuit is place in a good cover. This is the project over view. Now we going to its details.
Product Details
 |
| Finished Pocket BOOMbox |
Circuit Details
The full circuit is given below. The micro-controller ATtiny85 is the brain of this circuit. It is an 8pin SMD IC. It read the data from the memory card and it decode it and provide the music as analog signals in its output pin. It generate the analog signal by using the PWM technique. So the output PWM signal is demodulated to the normal audio signal by using a passive RC low pass filter.
 |
| Full circuit diagram |
Making
The making process contains two parts first is the PCB making then the cover making.The PCB layout is given in the right side.
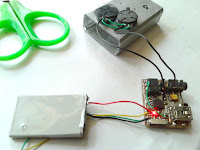
These are printed in a photo paper and done the etching by the help of the etching solution FeCl3. The proceed the soldering process. By completing a successful soldering we going to program the ATtiny 85 micro-controller. For this connect wire from the Attiny85 program pins (reset, sck, mosi,miso) and by the use of USBASP programmer board and software AVR burn-O-mat. By this method burn the HEX file and then burn the fuse bits. Then remove the wires and test the circuit by inserting a SD card. Before it copy the music files to it. Ensure that the music files are in the .wav format.
 |
| Completed PCB |
For converting the music files I use NCH 'switch file converter' application. then test it. After completing a successful testing connect all the wires, speakers and battery permanently.

Then make a cover and put the whole circuit into it. For cover I use a small tictac (mints) box.
The full detailed step by step making process is given in my Instructable page, Please visit it, Link given below,
The necessary files are given in my instrctable page, download from it.
For details about the Program, visit the given link,
http://elm-chan.org/works/sd8p/report.html
For more projects visit my YouTube , Blog, Instructable pages.


Very informative article thanks for sharing.
ReplyDeleteRocks Player is the ultra HD video and audio player which is fast and easy to use. It is designed to support different video formats like MKV, MPEG, MP4, 4K, and 8K. So, you can easily play HD and ultra HD videos on your device. There are unique features of Rocks Player.
You can sort videos from Genre, Albums, Artist, and Search and Manage track, create a playlist, and a recent playlist. You can also sort online videos with categories like news, music, sports, tech, comedy, etc. to search and play. There are also different themes available and you can also switch to Night Mode. You can also access photos from your device. Some of the other cool features of this media player are subtitle search, dual audio, playback speed, PIP mode, easy brightness, and volume control.
his blog ingeniously guides readers through the creation of a DIY portable pocket music player using the ATtiny85 micro-controller, elevating the experience of building a personalized gadget. By incorporating an SD card for storage, the project maximizes flexibility in storing music. https://www.mobilezmarket.com/
ReplyDelete