 |
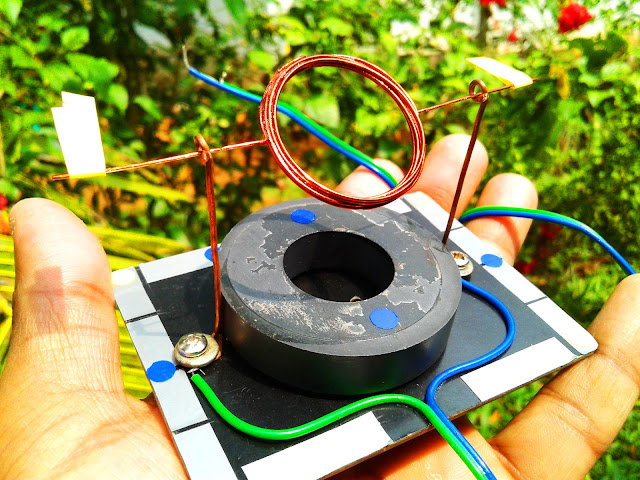
| Completed toy motor |
The toys are the starting point of our science journey. Every simple toy is work based on a simple science law, especially the physics. So every toy teach a new science lesson for us. So, here I make a simple (already available for you) toy for every toy lovers. It is the simple model of the modern brushed DC motor. It will simply revel the working of the DC motor. It's making is very simple and the components needed is easily available for every person. It is very interesting one.
The given video explain the working.
Construction Details
The given image indicate a typical brushed DC motor. It contain several parts.
 |
| DC motor parts |
Magnets
It is the stater part in the DC motor. It is fixed in its position. It is a pair of permanent magnets facing each other with opposite polarity. In large motors electromagnets are used instead of permanent magnets.
Coil
It is the rotor or the moving part. It is a laminated iron core in which insulated copper coils are winded. It is placed in between the magnets and it is free to rotate.
Commutator and Brush
It is used to connect the coil to the external power-supply. The commutator is connected directly to the coil and it rotates with the coil. The brush is ensure the continuous contact with the coil. Commonly carbon is used as brush.
Our DC Motor
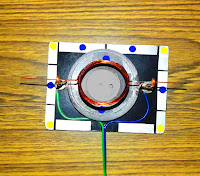
For stater magnet we use a round magnet from old speaker. The coil is made with out a core by using enameled copper wire. Then the main setup needed to work the motor is the brush and commutator setup. It makes the motor to run continuously, by making a variable magnetic field. This setup is made by the extra length of the copper wire from the coil. And it also act as the motor shaft. The whole setup is placed in a hylam sheet. Give an extra, low voltage dc for its operation from a battery. The given image indicate the parts of our DC motor.
 |
| Our motor plan |
Making
The coil is wind in a circular shape with about 10 turns by using a cylindrical bottle. The the coils are stick together by using super glue. Cut extra length of the copper wire and straighten the wire as shown in the image and balance its weight by changing the tapping position and ensure it rotate freely without vibration. The remove half of the copper wire insulation from 2 sides. Then erect it in a stand and connect wires to it and place a magnet below it. Then apply the power supply and first start it by using hands. Then enjoy...
Working
 |
| Final working model |
When we connect the battery, current is flowing through the coil. When current flowing through a coil, it produce magnetic field (polarity based on the direction of current flow (right hand thump rule)). This magnetic field produce by coil attract and opposes by each magnets and a force is created. Due to the force the coil rotate and align with the opposite poles of magnet and coil. But in the time the commutator changes the current polarity. So the produced magnetic field direction changes to opposite. So the coil again rotate for the stable alignment. This continue and rotate in a continuous manner
This is the working of brushed DC motor. Basically work by attraction and repulsion of two magnets. One is the electric magnet (coil), it changes its polarity while rotating. This produce the rotating effect. I believed that you understand this. OK. How is it ? Are you like it ? Please comment me.
OK.
For more detailed explanation for the making process. Please visit my instructable page, Link given below.
Bye.....see you in the next project..
Hurray! I finally did this. Thank you for sharing. It is easy to prepare. I am happy I made it. Buy Etizolam RX Online
ReplyDeleteGreat information.
ReplyDelete-------------------------------------------------
I work in fiberglass roofing panels
Fascinating exploration of toy-based science education! Your detailed Construction breakdown of the brushed DC motor showcases a hands-on approach to learning engineering principles, turning play into a valuable lesson in physics. Well-done on the inventive use of everyday materials, making science accessible and engaging for all enthusiasts.
ReplyDelete"Very great post.Thanks for sharing this post.
ReplyDeleteLooking for reliable DC motors? Tomson Electronics offers a premium selection perfect for various industrial and hobbyist applications. Known for their simplicity, durability, and cost-effectiveness, Motors are ideal for precise control and continuous rotation. Visit Tomson Electronics for all your motor and electronic component needs!"